GitHub Pull Requests
- GitHub 101
- GitHub Lingo
- GitHub Issues
- GitHub Pull Requests
This blog series started as a lightning talk at the 2017 PowerShell/DevOps Summit titled “Being an Upstanding Gitizen.”
You found a sweet open source project on GitHub. It’s not perfect, because it exists in reality. You opened an issue already…but you don’t have to stop there if you’re capable of lending a hand.
Help out the project by submitting a fix!
In this post, I’m going to sharply pander to the “on-premise” vs. “on-premises” crowd by fixing all instances of it in the official PowerShell-Docs repository. By the end, you’ll know how to handle each step required to submit a PR to your favorite GitHub project.
Table of Contents:
- First, some context
- Get the tools
- Target an issue
- Find the offending typos
- Fork the repository
- Clone your fork
- Create a new branch
- Add your commit(s)
- Sync your changes
- Open a pull request
- The code review process
- Resolution
- Up Next
NOTE: This post assumes Windows 10 and GitHub-supplied tooling. There are many other options available that I have to ignore for brevity.
First, some context
As mentioned when I covered [GitHub Lingo]:
If you want to submit changes for someone else’s project, it happens via a pull request.
You can select from three difficulties when creating commits and submitting a pull request:
- The Edit button when viewing a file on the GitHub website
- Good for very basic edits, like fixing typos
- Using the GitHub GUI client
- The path in this demo
- A good tool to start using Git locally, without needing to understand the CLI right away
- Using Git Shell, the GitHub for Windows CLI tool
- Provides a familiar PowerShell console with Git integration
- Great for advanced users and advanced Git operations
Option 1 still follows the Git model of forking the repository to your account, and immediately creating a new branch for your changes (usually “username-patch-1”). Any time you hit the Save button, it creates a commit on your new branch. You could then open a Pull Request directly in the web interface.
That makes Option 1 very appealing for quick typo fixes or documentation updates, because it skips cloning the repository to your local machine. But it’s still doing the basic workflow, just hiding those steps under the hood, so to speak. For that reason, I want to skip over it. If you want to try things that way, that’s great, too. You’ll figure it out on your own. ;)
Since I’m walking you through your first contribution to update a project, we’ll be going through Option 2. A GUI walkthrough will hopefully be more beneficial when you’re ready to start diving into code.
Get the tools
GitHub Desktop will install “GitHub” (the GUI client) and “Git Shell” (a PowerShell + Git CLI) on your machine.
Target an issue
As mentioned in the previous post, you should open an issue for bugs and feature requests. Pull requests, then, are at their best when they specifically target a single issue. By opening an issue first, you give the maintainer (and any other interested parties) a chance to discuss your bug/request. You also avoid wasting time coding a fix if the maintainer does not consider your issue to be a problem worth fixing.
And if you make your pull request too broad, by fixing five open issues at once, the code review process for others becomes much more difficult. LGTM
Maximize the chances of an accepted PR by targeting a single open issue.
The exception here is if your fix is trivial. Typos are the perfect example. I’m not going to open an issue to solicit feedback on a typo, just like I’m not going to log a helpdesk ticket because I spent two seconds on the phone telling someone to double-click instead of single-click. In this case , unsolicited PRs are recommended. If the maintainer rejects my drive-by, typo-fix PR…oh well, not a big deal.
Today’s target
In case you haven’t picked up on the first five times I mentioned it, all official PowerShell documentation has moved to the PowerShell-Docs repository, and pull requests from the community are welcome.
I’m going to kill two birds with one stone today by changing any instances of “on-premise” to “on-premises”. I want to improve PowerShell’s help for everyone, and as a self-deprecating grammar nazi, I want to provide value while making fun of myself for choosing a dumb example. It’s a win-win, really.
It’s also a really quick fix that doesn’t require you to wrap your head around any code, so you can focus on just the steps in this process.
Find the offending typos
Via the website
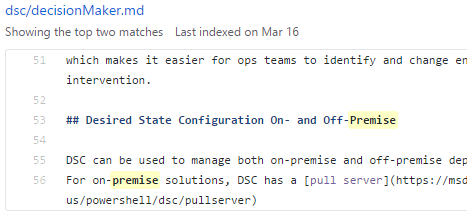
Once you click into the Docs repo, it’s easy to search for keywords within all files.
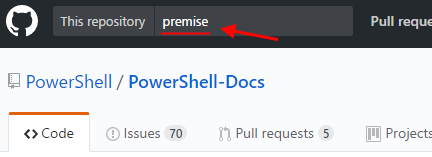
In this case, only one file was returned. This’ll be easy!
Via the local clone
Bonus level! Once you clone the repo to your local computer (two steps down in this walkthrough), you can use Select-String to “grep” any instances of the word.
Get-ChildItem -Path 'C:\Github\PowerShell-Docs' -File -Recurse |
    Select-String -Pattern 'premise'
This step gives me the same single file to care about, so let’s move on.
Fork the repository
You don’t have access to edit the PowerShell-Docs repo directly. You’ll first need to fork the repo to your own user account, so you can make your own changes.
From the PowerShell-Docs repo main page, hit the Fork button in the top right.

After a few seconds, you should automatically be redirected to github.com/username/PowerShell-Docs:
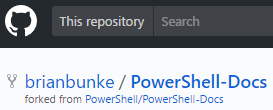
Also, when you view your GitHub profile now, the PowerShell-Docs fork will be listed as one of your repositories.
Clone your fork
Open the “GitHub” program now installed on your computer. Go here to clone (copy) your fork down to your local machine:
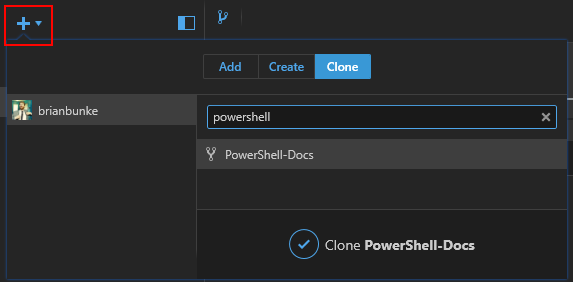
It’ll ask you where to save the folder. In this example, I use C:\GitHub\PowerShell-Docs\.
You can also clone a repo from the website, by hitting this button and then selecting “Open in Desktop”: 
Create a new branch
Why?
Short answer: Creating a new branch isn’t necessary, but it’s a good practice to get into, especially if you think you’ll submit more than one PR.
Long answer: Remember when I said that PRs are always a comparison between a source branch and the target branch? Consider this scenario:
- You fork & clone a repo
- You immediately make a change & commit to master on your fork
- You submit a PR for the change:
you:master>original:master - That PR sits for a while without being merged immediately
- This happens a lot. Questions, requests, real life interfering
- You want to submit a different change to the project, like adding a new help file
You shouldn’t make another commit on master, because the two changes are unrelated. Adding a new commit to master immediately tacks it on to the still-open original PR, complicating code review further.
If you branch off of your master now in hopes of submitting a second PR, your child branches will contain the first fix that hasn’t been accepted (yet?). This pollutes any other PRs you want to open up simultaneously.
When?
Well, branch once immediately. Just get in that habit, until you know a good reason not to. For any other potential branches:
Branches (and thus, pull requests) should remain small, targeting a single story. (“I want to fix incorrect usage of on-premises.”) Feel free to edit many files in the same branch if the changes are for the same single reason…if “on-premise” was found in 50 files, I’d fix all 50 files in the same branch, and submit them in the same PR.
On the other hand, if you want to make three small fixes that are unrelated, feel free to create three different branches off of master, one for each. Once you’re done, since you utilized different branches, you can open three PRs side-by-side.
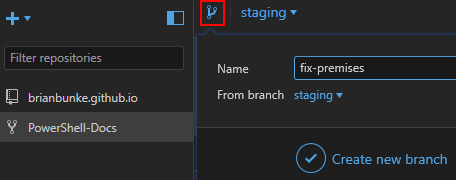
How?
Most repos default to the “master” branch, but this one defaults to “staging”. No difference; let’s make a new one for our fix. My opinion on branch naming conventions: ¯\_(ツ)_/¯
Add your commit(s)
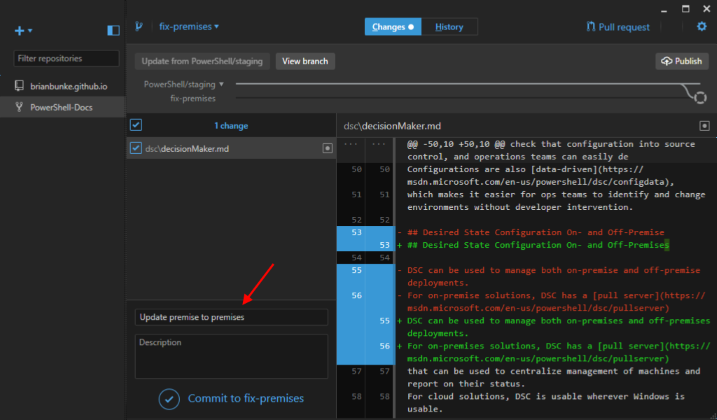
Open up the file(s) in your favorite editor, make the change(s), and save as you normally would.
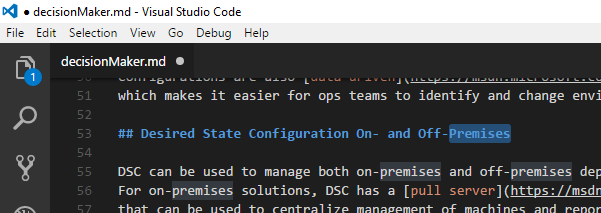
Upon saving, the GitHub GUI immediately senses the file has changed, displaying the diff in the Changes tab. You need to type a commit message and ensure the file(s) you changed have their checkboxes ticked. Then click on “Commit to branchname” at the bottom.
Sync your changes
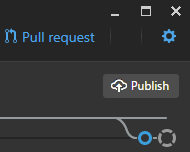
With your commit(s) added, you need to push your local changes out to GitHub (git push from the CLI).
However, the GUI combines git push and git pull, rebranding them as “Sync”. (The button usually says “Sync”, but it says “Publish” in this image because I created a new branch and haven’t told GitHub about it yet.) The blue circle is my current commit that hasn’t been pushed; it’ll become a dot once GitHub knows about it.
Once you’ve published/synced, you should be able to browse to your fork’s branch and see the edited file on the GitHub website.
Open a pull request
Whew. Now we can finally submit this “upstream”, to the official PowerShell-Docs repo.
As you can see in the previous screenshot, it’s easy to open a PR directly from the GUI client. I prefer not to, because you can see emojis and a preview tab if you create the PR on the website. Good reasons, right?
On the website, browse to your fork > your branch, then hit “New pull request”. 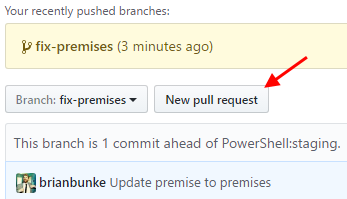
This repo has a PR template, so the text field is pre-populated. Follow the instructions (which in my case tell me to remove the template, heh).
If you see an empty text field, provide some context for the reviewer. If you’re fixing an issue, refer to the issue number. (“Fixes #42.”, which would automatically close #42 when the PR is merged.)
You can view the end result, PR #1203, here!
The code review process
You may run into the following once you submit your PR:
- Corporate repos, like Microsoft, will have a bot ask you to sign a CLA
- Automated tests may run against your changes to see if something obvious would break
- If you get a red X showing a failure, you should be able to click on that error to get more info
- It’ll then hang out, waiting for a maintainer to set a pair of eyes on it
Come into the review process with an open mind, and be receptive to feedback. Both sides want the PR process to be successful and motivating.
From a technical standpoint, if changes are requested: Know that when you make additional commits to your source branch, the open pull request immediately updates with the changes from those new commits.
Resolution
Your PR will either be closed or merged.
If it’s closed without merging, take the feedback into account and decide what you want to do next. Sometimes there are hurt feelings here (despite all the effort to avoid them), but most of the time it’s no big deal, and you’re on to the next one.
If it’s merged, congratulations! Revel in how far you’ve come. You’ll now see that repo in your dashboard’s “Repositories you contribute to” list forever. :)
Up Next
Hopefully, this series has held your hand from GitHub noob all the way to feeling comfortable making your first contribution when the time is right. Or, if you’re already familiar with GitHub, maybe you were able to fill in some gaps in knowledge.
If you have any feedback/success stories/suggestions, please let me know! I’d love to hear from you. Those social links down at the bottom should get you to the right place.
But in reality, what’s next is I’m going to play Rocket League (pretty poorly) and source any other activities that make me forget about blogging all weekend. :D
I hope to see you in the PowerShell GitHub ecosystem soon!
Acknowledgments
- @psCookieMonster for making the Summit Lightning Demos a reality
- General suggestions on the series from lipkau