Azure Functions and Azure API Management
- Build a Serverless API in Azure
- PowerShell in Azure Functions
- GitHub Integration with Azure Functions
- Add an API spec in Azure Functions
- Azure Functions and Azure API Management
- Serverless API Series - Conclusion
When we left off, you had a Functions App with its very own published Swagger API spec. You can test it while logged into the Azure portal, and query each endpoint from your own computer. Isn’t that good enough?
Well, maybe. If you’re the only one using it, for personal tasks, that’s probably good enough! Before you call it quits, though, you should check out what Azure API Management (APIM) can do for you.
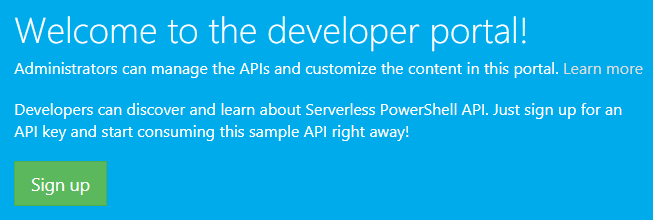
Table of Contents
- Benefits of APIM
- Cost disclaimer!
- Provision API Management services
- Import your Function App
- Replacing Named Values
- Test all the things
- That’s it, wash your hands
Benefits of APIM
Allow me to summarize benefits of leveraging APIM, so we know what we might be missing:
- Developer portal
- Self-service account creation and API key assignment
- Swagger-style API documentation and interactive API call testing
- Access control
- Publish to the public, but retain control with API keys
- Throttle users (quotas, rate limits) to prevent DOS attacks or consumption cost spikes
- Customizing the base URI of API endpoints
- Suffixes like
/prod/or/test/ - API versioning via path/header/query
- Even custom domain support
- Suffixes like
- Stitching multiple APIs together
- You can import multiple back-ends into the same API front-end, if you’d like to expose it in one coherent package to your users
IDK about you, but that sounds pretty cool. Well, and I have a blog post to write, so there’s no turning back now.
Cost disclaimer!
In Production, however, is no free tier for Azure API Management yet. In the US, the developer tier currently costs ~$50 USD per month, and the basic tier is almost $150. Pricing sheet
Granted that this prices it out of most personal projects, into solely business use cases. It’s still cool, and you should still know about it.
If you proceed with this post, please delete your API Management service at the end (and pay ~$0.07 USD for one hour of runtime), or be aware of the potential bill.
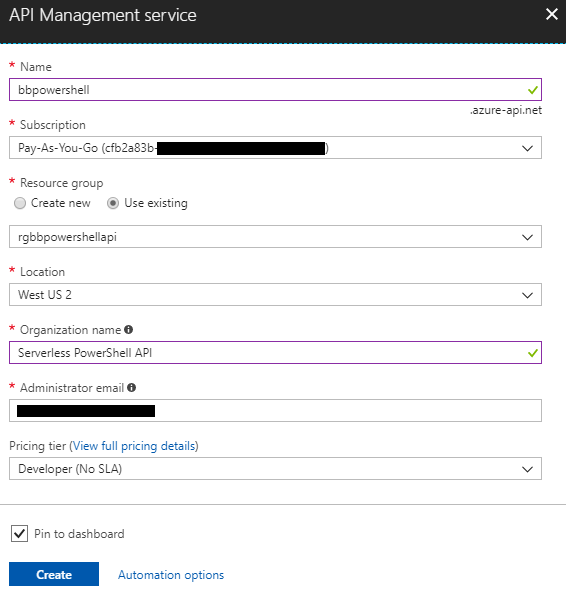
Provision API Management services
Creating is simple, but then you’ll wait about 30 minutes for your new APIM service to be provisioned.
Official doc: Create a new APIM service instance

Import your Function App
Official doc: Import a Function App as an API
Once it has been provisioned, from your new APIM service:
API Management > APIs > Add a new API > Functions App

Once you select your desired Functions App, most of the info needed imports from your Swagger spec. Use the Unlimited product for the sake of this walkthrough, or your auth keys will not automatically appear in the headers of your test calls below.
Less than 24 hours after creating that screenshot, Azure added a “Tags (preview)” field you don’t see there. Things are not looking good for the longevity of this walkthrough.
Replacing Named Values
Upon import, you’ll see the following pop-up message:
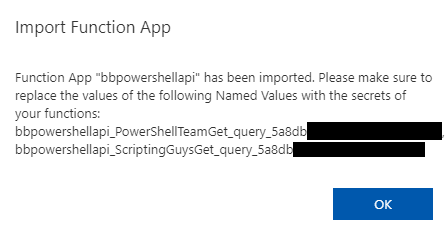
Authorization from APIM to the Functions App won’t work until this is resolved.
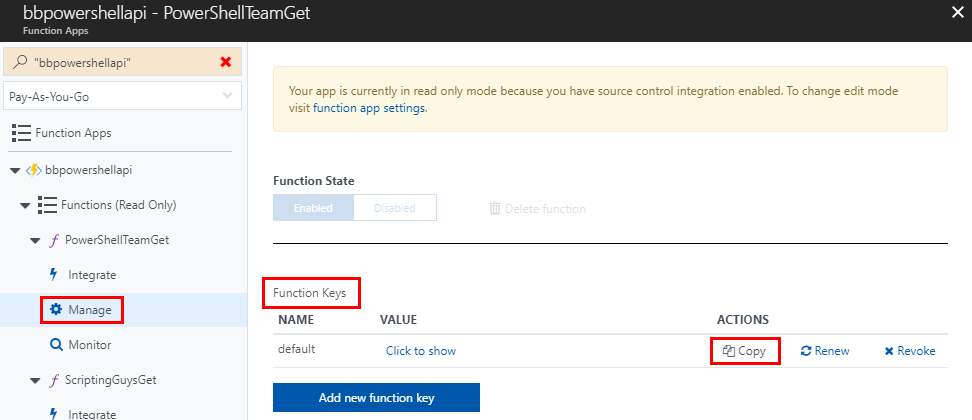
For this, we’ll need to head back to the Function App for a minute. You’ll need to record the “Function Key” of each function inside the Function App, one by one.
After getting each function, go to the “Named values” area in APIM, then select the first name.
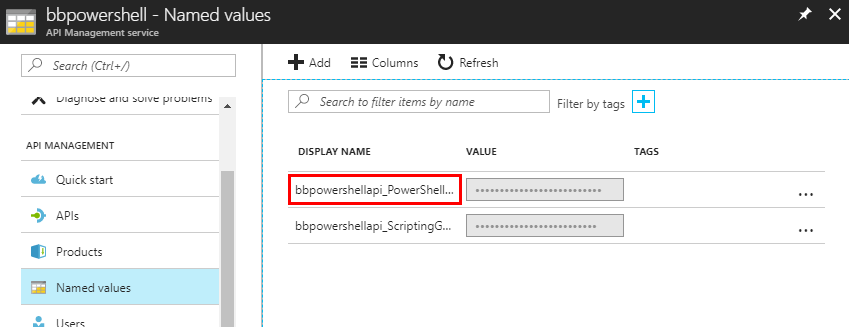
A new panel opens. “Show value”, paste in the corresponding function key, and Save.
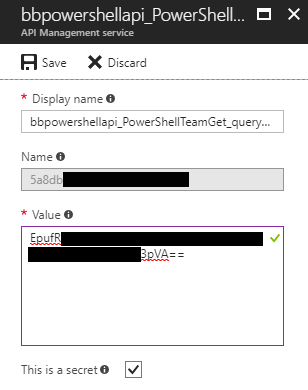
Repeat for each function & named value.
Test all the things
From APIM in the Azure portal
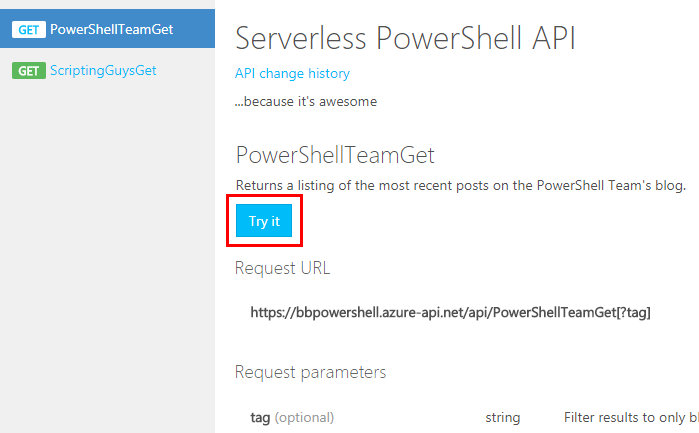
With the function keys in place, now it’s time to make a test call from APIM. We can do this within the “Serverless PowerShell API” management area, in the Test tab.
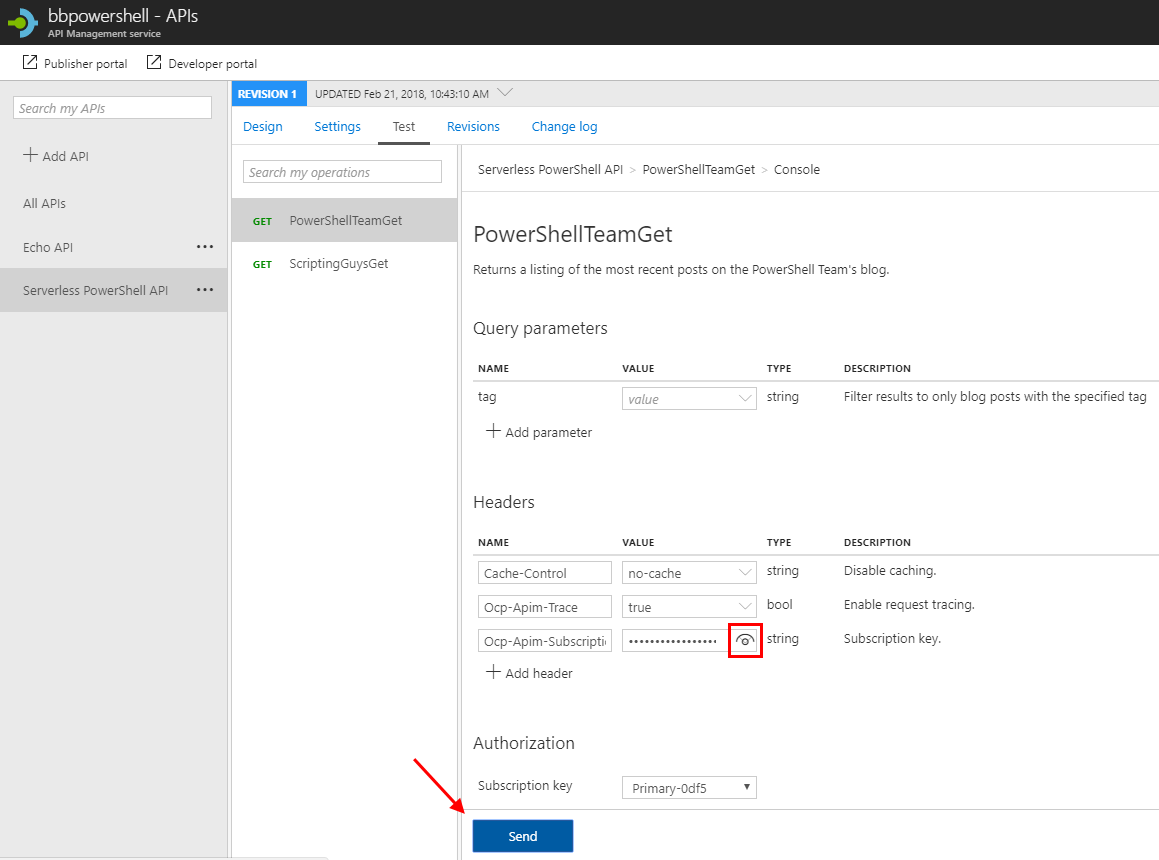
You should hit the button to unmask that key, because you’ll want to copy it for our PowerShell test later.
This should return “200 OK” with the actual results below. 401 means you still have an authorization issue somewhere.
From the rad developer portal
Come on now, we’re here for the developer portal. Get there at https://yourname.portal.azure-api.net, or via the Azure portal.
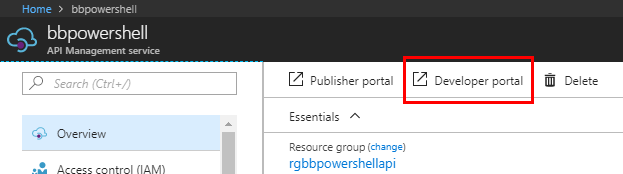
Right away, the biggest action button is “Sign up!” where you can grab an API key and get started. If you came from the Azure portal, you should already be logged in to the dev portal as “Administrator”, so head to the API and “Try It”.
Looking good, my friend. Looking good. Again, if you’re logged in and the API is assigned to a product, the subscription key fields should already be filled in and ready to go.
Don’t forget your local PowerShell console
Note that APIM has moved us from query-based auth to header-based auth.
# Replace with yours ;)
$YourURI = 'https://bbpowershell.azure-api.net/api/PowerShellTeamGet'
$YourKey = @{'Ocp-Apim-Subscription-Key' = 'blahblahblah'}
# Try a GET on the PowerShell Team function
Invoke-RestMethod -Method Get -Headers $YourKey -Uri $YourURI
# And GET with a "core" tag
Invoke-RestMethod -Method Get -Headers $YourKey -Uri "$($YourURI)?tag=core"
That’s it, wash your hands
We are officially done with the technical content in this series. Take a stretch, hug your loved ones, maybe imbibe a beverage. From here, you’re free to experiment as you see fit. (If you spin off and find something else cool, I hope you’ll share!)
Tomorrow, I’ll wrap up the series with some small lessons learned and potential future plans. Cheers!
Next post in the series: Serverless API Series - Conclusion